How to Use SolPrompter: A Complete Teleprompter Guide
SolPrompter is a browser-based teleprompter for presenting and recording. This guide walks you through everything from adding your script to recording a finished take — no installation and no account required.
Before you start
All you need is a browser and a script. A camera and microphone are optional for presenting, but you will need to allow browser access to them if you want to record video and audio.
For a complete list of setup and delivery tutorials, browse our Teleprompter Guides.
1. Add your script
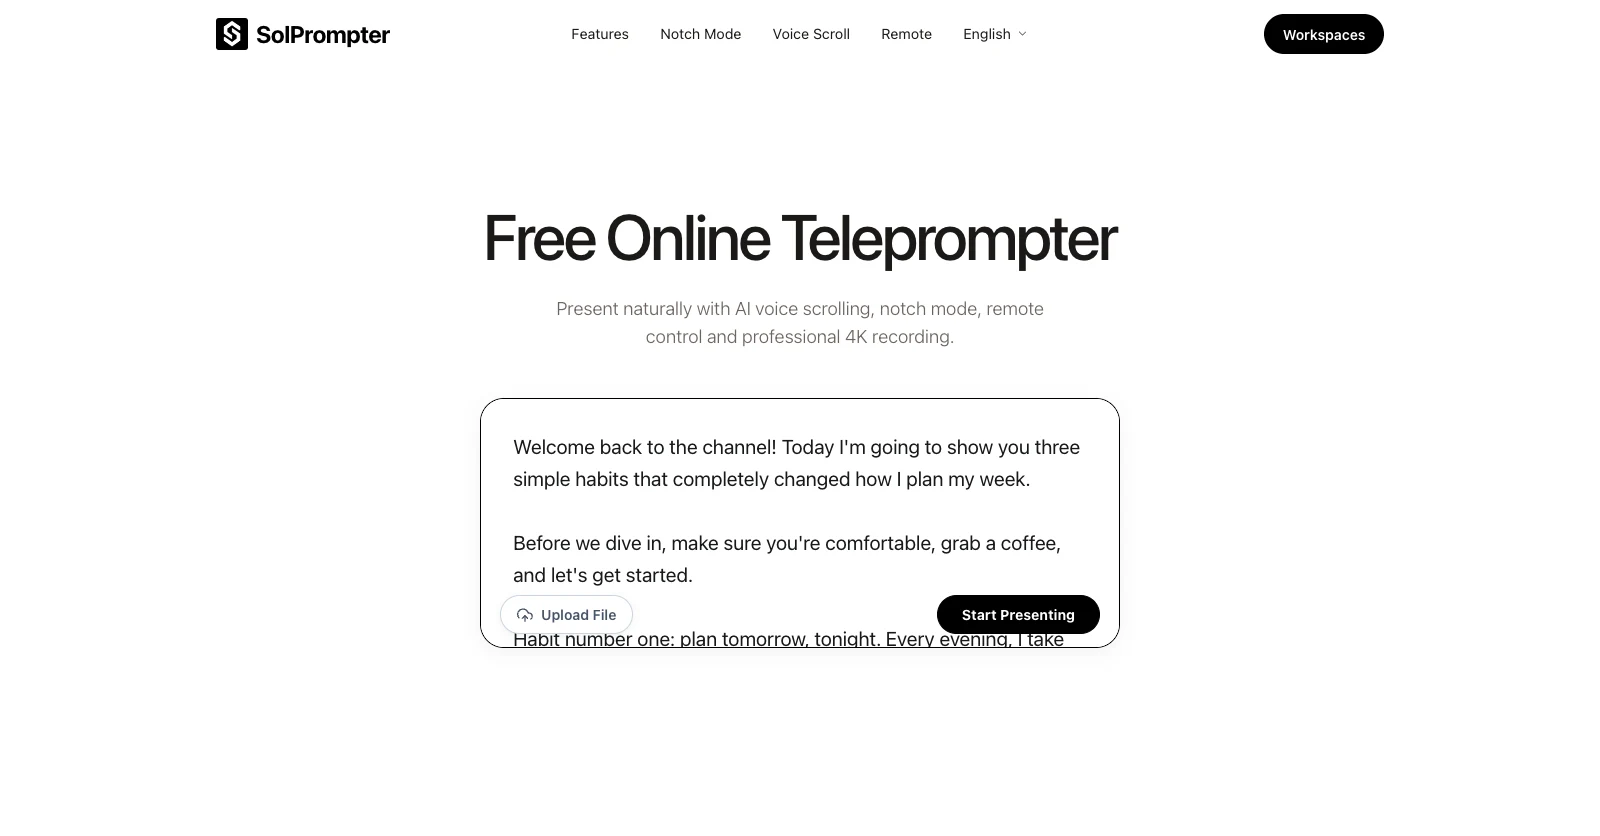
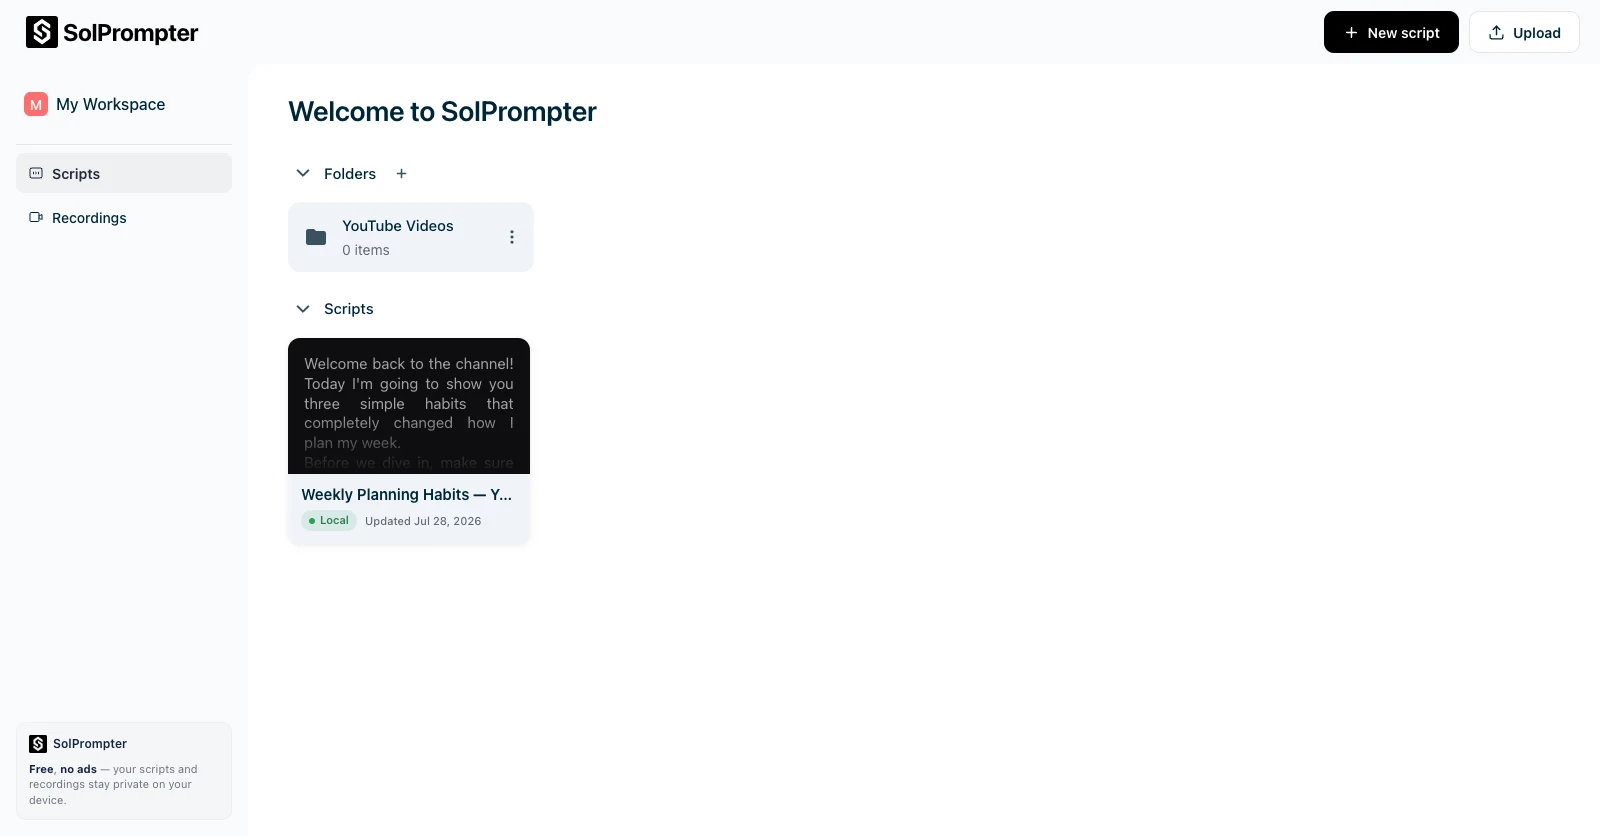
Start on the SolPrompter home page. You can paste or type your script directly, or upload an existing file from your device.
- Paste or type: click into the script box and enter your text.
- Upload a file: use the Upload button, or drag and drop a file onto the page.
- Supported formats: TXT, DOCX and Markdown files, or plain pasted text.
2. Open the teleprompter
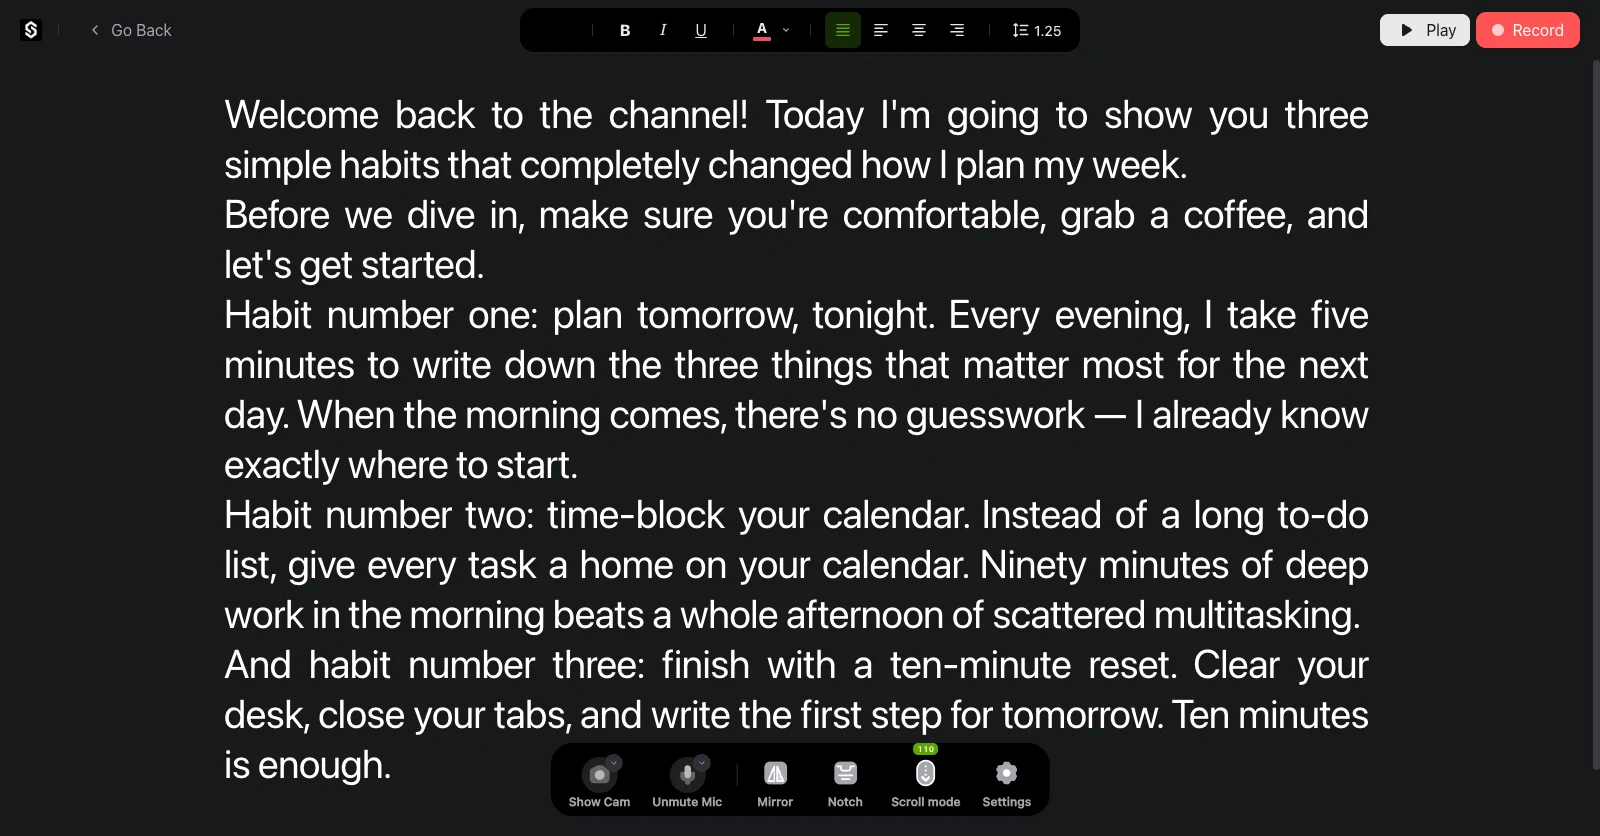
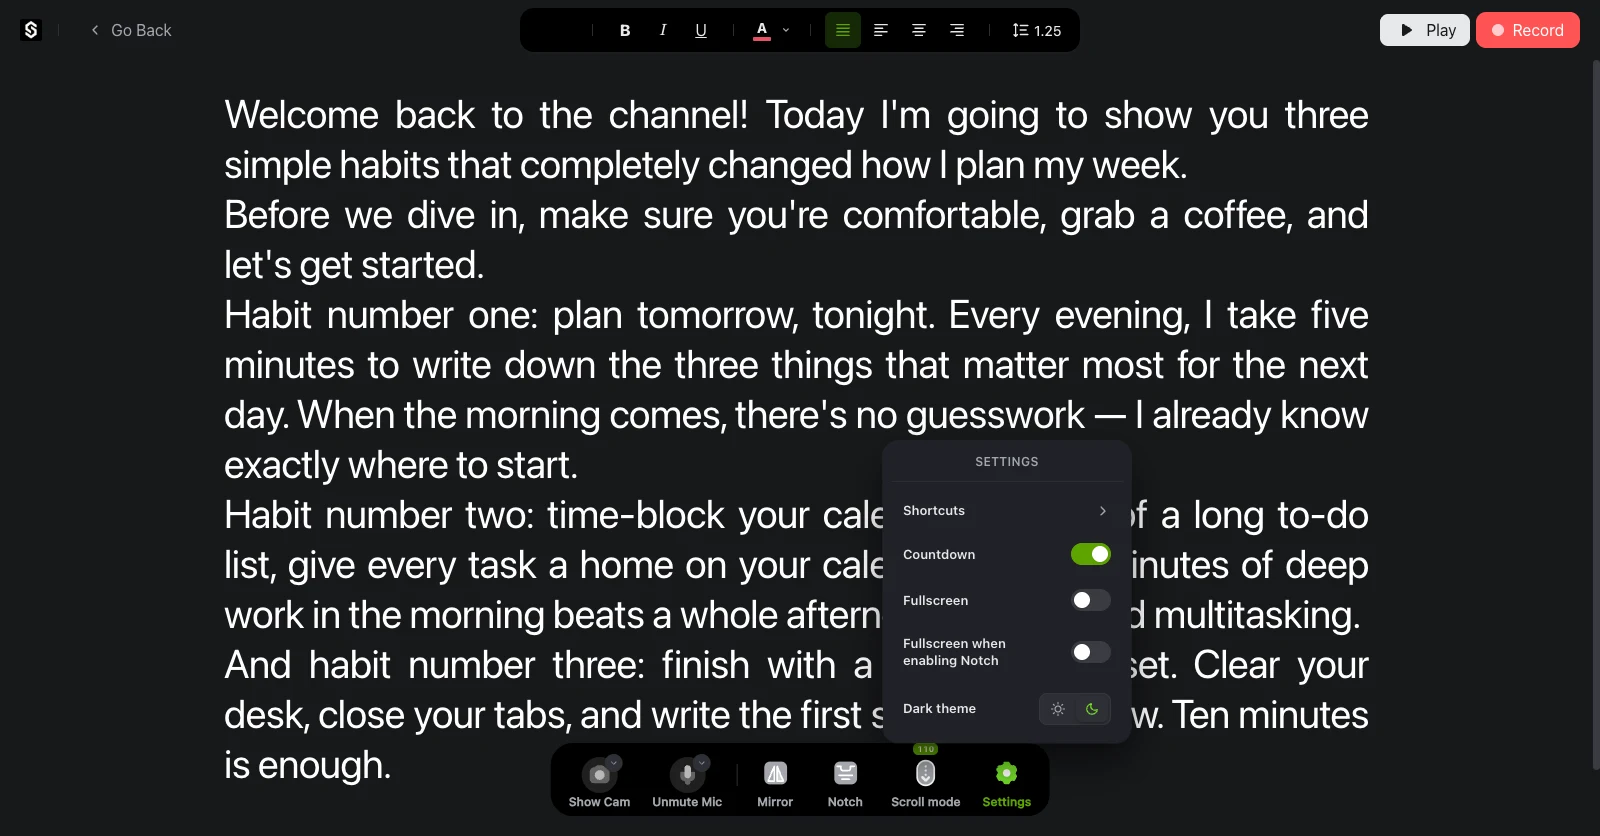
Once your script is ready, open it to launch the teleprompter view. Your text fills the screen, ready to read. You can present as-is, or turn on your camera to record while you read.
3. Choose your scroll mode
SolPrompter offers three ways to move through your script so you can present at a pace that feels natural.
- AI Voice Scroll — SolPrompter listens to your speech and scrolls automatically at your natural speaking pace. Turn it on, allow microphone access and simply start talking; the script follows you and waits when you pause.
- Auto-scroll — the script scrolls at a fixed speed. Open the Speed control to set your words-per-minute (WPM); the default is 110 WPM. Use the slider or type a custom value.
- Manual scroll — control the script yourself with the arrow keys or by scrolling on a touchscreen, for a traditional autocue feel.
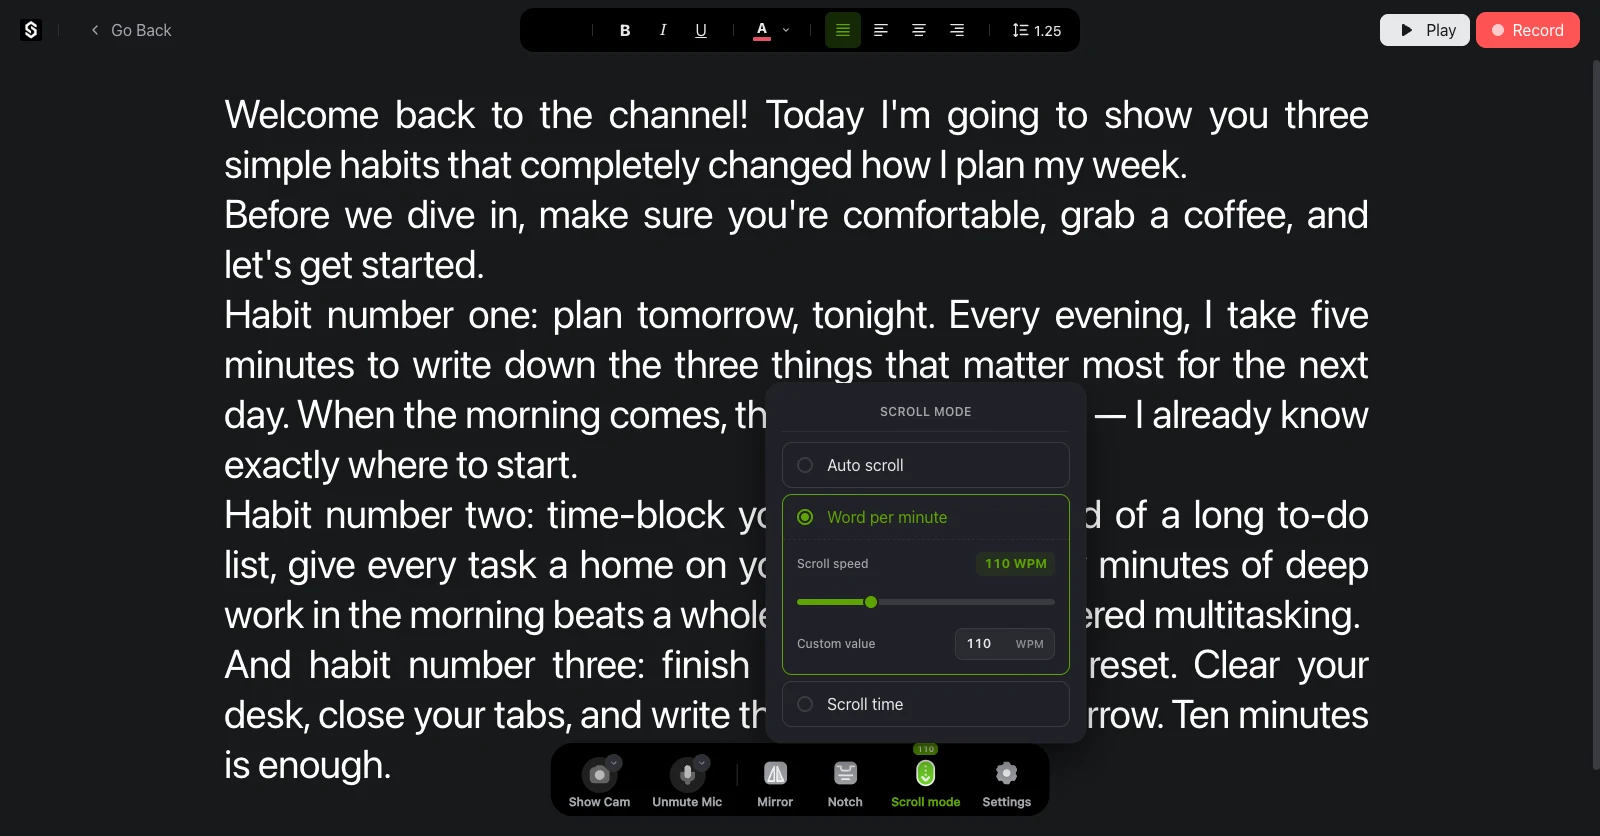
Press Play — or the Space bar — to start and pause scrolling at any time.
4. Adjust your reading view
Use the format toolbar to make the script comfortable to read from where you sit or stand.
- Font size — choose from 16px up to 48px.
- Text style — apply bold (Ctrl+B), italic (Ctrl+I) or underline (Ctrl+U).
- Text color — pick a preset or choose a custom color.
- Alignment — align text left, center or right.
- Mirror mode — flip the text horizontally for use with a beam-splitter rig or when the camera sits beside you.
- Eye line — drag the horizontal guide to mark where to look for the most natural eye contact.
- Margins — drag the left and right guides to set your reading width.
5. Use Notch Mode for natural eye contact
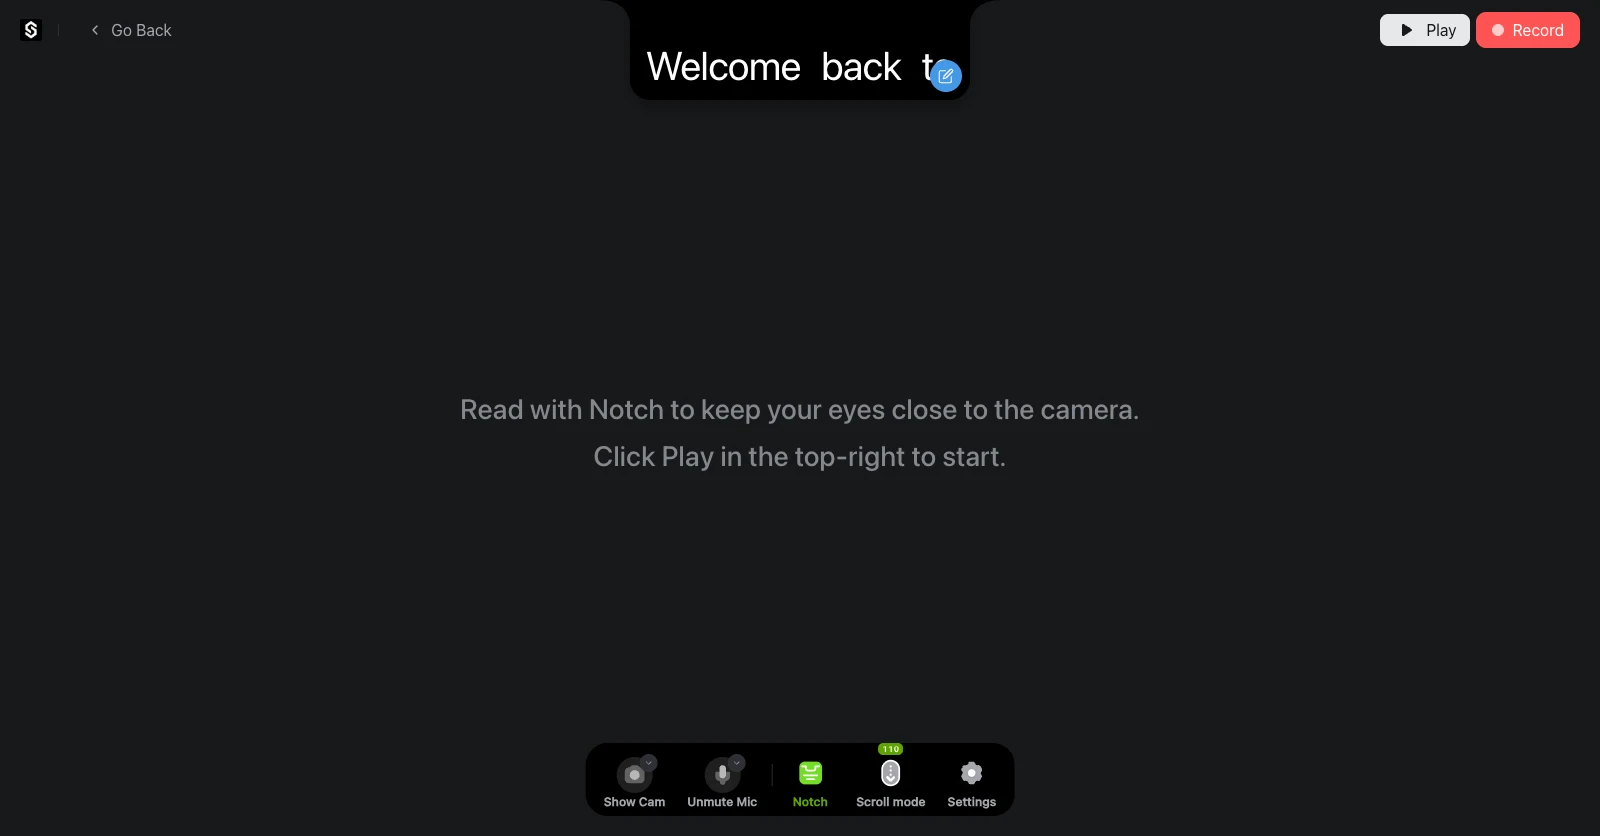
Notch Mode places a compact reading window near the top of your screen, close to your camera, so your eyes stay near the lens.
- Turn on Notch Mode from the toolbar.
- Drag the window to position it directly under your camera.
- Resize it from the edges or corners to show only the lines you need.
- Edit the text in place — your changes sync back to the main script.
6. Control SolPrompter from another device
Remote control lets you run the teleprompter from a second phone, tablet or computer, so you never have to touch your recording device mid-take.
- Open the remote option and connect your second device.
- Start and pause scrolling.
- Speed the scroll up or slow it down.
- Jump forward, back or to another section of your script.
- Start or stop recording, where your device and browser support it.
7. Record your video
SolPrompter combines the teleprompter and your camera in one place, so you can read naturally and record without switching apps.
- Turn on your camera to see a live preview and check your framing.
- Open Settings to pick a resolution — SD, HD, Full HD (1080p), 2K or 4K — and a video ratio such as landscape, square or portrait.
- Enable the microphone for audio, and optionally a 3-second countdown before recording.
- Press Record to begin, read your script, then press Stop to finish.
- Review your take, then record again or keep it.
Recordings are saved privately on your device and never carry a SolPrompter watermark.
8. Manage scripts and recordings
Keep everything organized from the SolPrompter home page so it is ready for your next presentation.
- Create and edit scripts directly in SolPrompter.
- Organize scripts into folders, and rename or move them as needed.
- Reuse a script anytime — it reopens with your saved reading settings.
- Find every recording in the Recordings library, linked to the script it came from.
- Export a script as a file to back it up or move it, and import it again later.
Keyboard shortcuts
Speed up your workflow with these shortcuts on desktop.
- Space — play or pause scrolling.
- Up / Down arrows — scroll up or down.
- Left / Right arrows — decrease or increase scroll speed.
- Enter — jump to the next paragraph.
- Ctrl+B, Ctrl+I, Ctrl+U — bold, italic or underline.
Tips for a great take
- Position the reading area as close to your camera lens as possible.
- Use AI Voice Scroll or a comfortable WPM so you never feel rushed.
- Record a short test clip to check framing, lighting and audio first.
- Keep sentences short and add line breaks where you want to pause. If you want to read naturally, see our guide on <a href="/blog/how-to-read-a-teleprompter-naturally/">how to read a teleprompter naturally</a>.
Troubleshooting common issues
- Camera or microphone unavailable — check the browser permission shown beside the address bar, allow access and reload SolPrompter.
- Text moves too quickly — lower the WPM setting, switch to AI Voice Scroll or pause with the Space bar.
- Text appears backwards — turn off Mirror Mode for a normal screen; use it only when reading through a beam-splitter teleprompter.
- A higher recording resolution is unavailable — choose a resolution supported by your device, camera and browser.
That is everything you need to present and record with SolPrompter. Open SolPrompter, add your script and start speaking naturally.
For a feature-by-feature look at the product and its testing process, read SolPrompter AI Teleprompter: Features Tested.